Recent Blog Posts
-
How to repair scuffs & scratches on leather
-
How to clean a leather sofa
-
How to clean aniline leather
-
How to restore leather
-
How to change the color of a leather sofa
-
How to repair a tear in a leather sofa
-
How to repair cat scratches on leather
-
How to repair a cut in leather
-
How to soften leather
-
How to repair a burn in leather
-
How to restore a leather car seat
-
How to remove stains from leather
-
How to change the color of leather car seats
-
How to restore a convertible roof
-
How to restore a shoes shine
-
How to clean classic car leather seats
-
How to get a spare piece of leather
-
How to fix a hole in a leather car seat
-
How to repair a chip in wood
-
How to repair deep scratches in wood
-
Oiling decking - How to apply decking oil
-
How to oil A chopping board
-
How to prevent staining, color loss and general wear
-
How to restore and protect your cutting board
-
How to clean and restore garden furniture
-
How to clean leather

How to restore a leather car seat
This guide will show you how to restore the color of a leather car seat, using our leather car seat restoration products. Because we can match the color of leather exactly, you can use our Leather Colorant Kit to restore the full interior, or one car seat, or even just a worn panel.
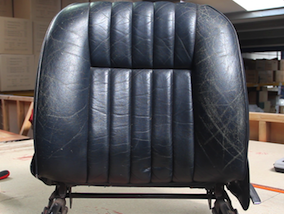
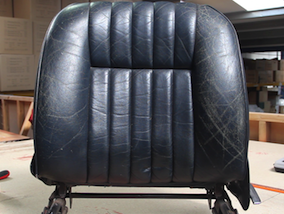
This photo shows a worn leather car seat. In this article we will restore the colour to the two front seats of this car interior.
Products for leather car seat restoration
- Leather Colorant Kit - Used to restore the leather car seat
- Flexifil- To fill cracks (where needed)
- Leather Binder - To strengthen the leather
Restoring leather car seats - step by step
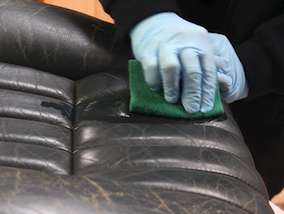
Step: Leather preparation
Apply some of the Leather Prep (included in the Colorant Kit) onto the leather by lining the cotton balls included in the kit, along the center of the abrasive pad and pouring on some Leather Prep. Fold the abrasive pad over to cover the wet balls and use this to apply to the leather. This allows a controlled release of prep and helps to make the product last longer.
This process will remove the manufactured finish and also some of the color, which you can see in the photo. After rubbing a small area, wipe it down with a cotton cloth to remove any excess color from the leather. The leather is correctly prepped when you start to see color transfer from the leather onto the abrasive pad or cloth.
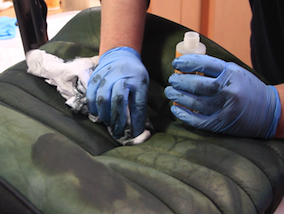
Step 2: Clean the seat with Alcohol Cleaner
The above process will have removed the manufacturers finish and any silicones that are soluble in solvents. There are however some silicones like spray on polish and waxes that aren't soluble in solvents, and so to remove these we need to use the Alcohol Cleaner (included in the Leather Colorant Kit).
Simply wipe the leather down with a cloth dampened in the Alcohol Cleaner, taking care to treat the entire surface. Now wait approximately 30 minutes for the cleaners to evaporate.
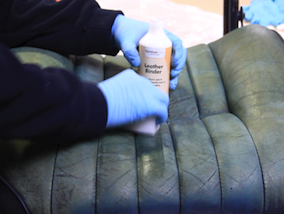
Step: Repairing the leather
Once the leather is dry, it is important, particularly for old or worn leather, to strengthen it with Leather Binder. To do this, simply take a sponge and pour on a small amount of Leather Binder, then use this to work it into the surface of the leather. After applying a full coat, leave to dry. Any build up of binder in crevices or stitching areas should be wiped away before it can dry. Once dry, apply another coat of Binder in the same manner and repeat this process for approximately 8-10 coats.
To smooth over any areas of cracking, the Flexifil is applied using a palette knife and wiped on in a thin layer so that it only goes into the cracks. The filler is then left to dry for about 5-10 minutes, The filler can then be sanded down with very fine sandpaper (1200) to make it smooth. This process can be repeated until all cracking is level with the surface of the leather.
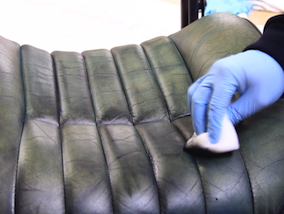
Step 4: Restoring color to the car seat
When you are satisfied all cracking is filled and the Flexifill has had ample time to completely dry, shake the bottle of Leather Colorant for about three minutes to make sure it is well mixed. Pour a small amount onto a sponge and rub into the leather. The idea is to sponge on a thin coat of colour working it into any gaps, creases and hard to reach areas.
Also notice the on the photo above, after applying the colourant by sponge, we have applied another coat of filler. Sometimes your repair looks perfect until you put the color on, and then it shows the cracks very lightly. So, if this happens, just re-fill and apply the color again. There is no need to take the color off; both products work perfectly with each other.

Step 6: Spray the leather with Colourant and Finish
Once one full coat of color has been sponged onto the car seat, set up the airbrush and spray a fine coat of color onto the leather and leave to dry. When dry apply another coat, then repeat this process, building up the colourant in a series of thin coats. There are no hard and fast rules for how many coats should be used, simply apply as many as it takes to sufficiently cover any base color or repairs made.
When you are satisfied that you have applied sufficient colourant, the Leather Finish should be applied.
The Leather Finish is the same finish that we removed at the start of the process. It’s applied by airbrush so it’s important to ensure your airbrush is cleaned thoroughly after spraying the Leather Colorant.
The kit contains both Gloss and Matt versions of the Leather Finish, which can be mixed together at different ratios to achieve the right level of sheen for your leather. Here is a quick guide to achieving different sheens:
Gloss: 100% Gloss
Semi-Gloss: 75% Gloss and 25% Matt
Satin: 50% Gloss and 50% Matt (this is often used on leather furniture)
Semi-matte: 25% Gloss and 75% Matt (this is what you’d normally find on a car interior)
Matt: 100% Matt
It’s important to thoroughly shake each bottle before opening.
Mix the finishes together to create the version that you’re after, using the guide above as a reference. Once mixed, test the finish on an inconspicuous are to make sure you’re happy with it. You can adjust it by adding more matt or gloss, as needed. If you’re unsure what finish you want, start with Satin and adjust as required from there
Once you’ve found a mixture you’re happy with, it’s time to add the Crosslinker Eco. This should be added at a ratio of roughly 1:8. For reference, add 15ml of Crosslinker to 125ml of Finish.
The finish is applied exactly the same way as the colorant. When you spray the Leather Finish onto the leather, make sure it is dry before spraying on a second coat. Like the Leather Colourant, you can use a hairdryer to speed up this process.
Once the job is complete, wait one day before using the leather.