

Leather Stain Remover is specifically formulated to remove a wide range of stains from any leather surface, without damaging the leather itself. It is perfectly safe to use on all types of leather, with the exception of more absorbant types such as Aniline or Pull-Up leather. Although a dye transfer stain is used for demonstration, the same process can be used for any of the stains listed previously.
If you would prefer a text/image guide on how to to quickly & easily remove stains from leather, simply follow the steps laid out below:
STEP 1: CLEAN THE AREA
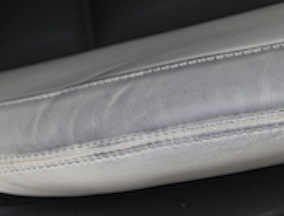
For the purposes of this guide, we will be removing a dye transfer stain from this leather car bolster, the same method can be used to remove any of the stains listed previously.
Before attempting to remove a stain from leather, you should clean the entire surface with Leather Ultra Clean. This removes any dirt or contaminants on the surface of the leather, leaving it ready to apply the Leather Stain Remover.

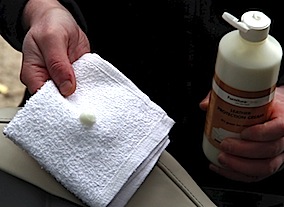
STEP 2: APPLY STAIN REMOVER
After cleaning the area, take the Leather Stain Remover and apply a small amount to a cloth, taking care to avoid spilling any directly on to the surface of the leather.
Use this to gently rub the stain remover onto the stained area, applying just enough pressure to begin removing the stain. Too much pressure or aggressive rubbing may result in damage to the finish of your leather.
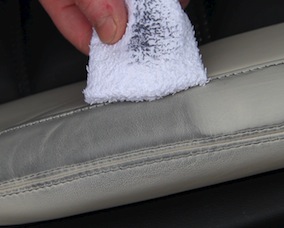
STEP 3: KEEP APPLYING
When you begin to see the stain transfer from the leather onto the cloth you are using (as shown on the image to the left) simply switch to a clean area of the cloth, and apply more Leather Stain Remover as before.Repeat this process until the stain has been completely removed and you no longer see any of the stain being transferred onto the cloth.
Note: If at any stage during this process you begin to see the color of the leather being transferred onto your cloth, stop immediately and leave the area to dry. Once dry you can continue to remove the stain again as described.

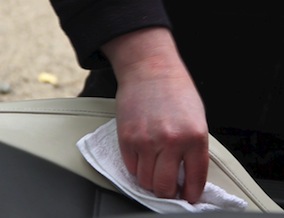
STEP 4: CLEAN THE AREA AGAIN
Once you are satisfied that the stain has been completely removed, the area should be cleaned again, using Leather Ultra Clean and a sponge. To do this, spray the Leather Ultra Clean onto the sponge and squeeze until it forms a foam, then use this to clean the entire area thoroughly. This stage will remove any excess stain remover that may be left over from the stain removal process. When clean, simply wipe the area down with a clean cloth to remove any remaining product from the leather.
STEP 5: PROTECT YOUR LEATHER
In order to protect your leather from staining & dirt in the future and to make it easier to maintain, it is highly recommended that you apply Leather Protection Cream. Protecting your leather in this way will ensure that it effectively repels all types of staining and holds dirt on the surface to be easily wiped away.Leather Protection Cream is applied with the use of a clean cloth; simply take the cloth and add a small amount of Protection Cream, as shown.
STEP 6: APPLY PROTECTION CREAM
Use the cloth prepared in the previous step to apply a good coat of Leather Protection Cream to the entire surface of the leather. Care should be taken to treat every part of the leather, including hard to reach areas such as folds, wrinkles and stitching, to ensure complete protection. When this is done, leave sufficient time for the leather to dry before using it again.
By following this process, you can not only remove practically any stain from your leather sofa, chairs, upholstery, clothing, car interiors and seats, but you will also ensure that they are fully protected from future staining and dirt. This will keep your leather looking and feeling like new for longer, and will extend its functional life significantly!
 Leather Cleaner
Deep cleans dirty leathers removing all dirt & grime with little effort.
From $11.95Backed by the prestigious Good Housekeeping Seal, our ultimate all-purpose leather cleaning solution, provides safe, deep, effortless cleaning for all types of leather.
- Awarded best leather cleaner
- Suitable for all colors of leather
- Safe to use - no solvents or abrasives
- Clean all types of leather with ease
- Turns to foam for easy cleaning
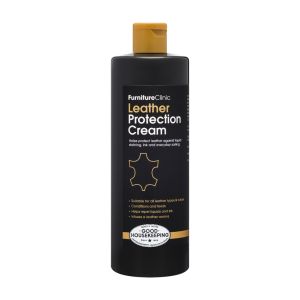 Leather Protection Cream
Leather Protection Cream feeds, protects and re-instates the smell into old and new leather items...
From $11.95With advanced barrier technology, our Leather Protection Cream feeds, conditions and protects leather while also restoring the luxurious leather aroma. Backed by the prestigious Good Housekeeping Seal, it is suitable for all leather types and clors and will help repel liquid and ink stains, helping your leather look good for longer.
View Product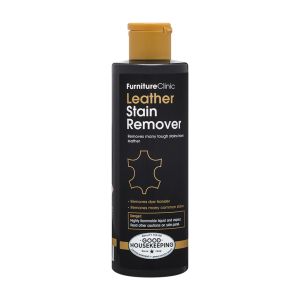 Leather Stain Remover
Leather Stain Remover will safely remove all stains from all leathers.
It’s ideal for remo...From $14.95Our Leather Stain Remover removes even the toughest of stains from all items of leather, including: dye transfer from jeans, clothing and cushions; newspaper and magazine print; food and drink stains; and many more.
View Product