

This guide will show you how to change the color of a leather car seat. We will be changing the color of this car interior from red to cream, but it is possible to change to any color you want. A color change can be made from any color to another, i.e. black to white, or white to black, with just as successful results.
The Leather Colourant Kit used in this guide can be used to change the color of all leather, vinyl, plastic, PVC & leather cloth car interiors.
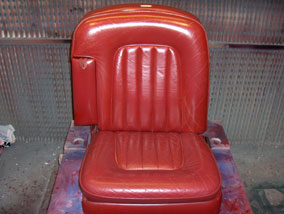
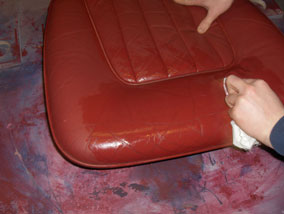
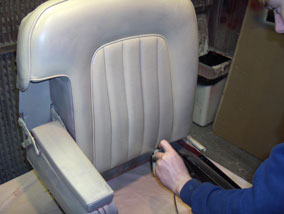
This photo shows a red leather car seat from a Rolls Royce. This guide will show you how to change the color of the leather car interior.
Products Required:
- Flexifil - To fill cracks
- Leather Colorant Kit - Used to change the colour of leather
STEP 1. PREP THE LEATHER
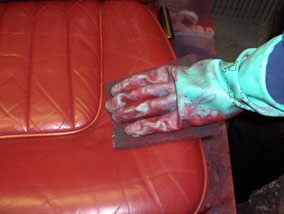
The first stage is to prep the leather using an abrasive pad. This process removes the transparent manufactured finish applied to the leather. Removing the finish allowing color to properly adhere to the leather.
As shown in the photo, as the finish is removed, so is the color (but not all the color). Basically, when you remove some color form an area, that indicates the finish has been removed, and so, you can move onto the next area.
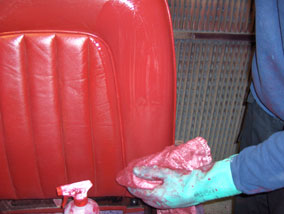
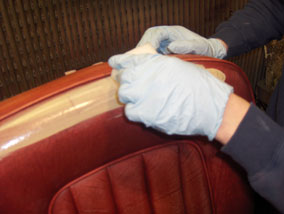
Once you have prepped an area with the abrasive pad, you often get a lot of prep and color sitting on the surface. This is very common with old Rolls Royce, Jaguar, Bentley, Aston Martin and other cars that used Connolly leather.
So, we wipe the leather with a cloth to remove the excess prep & color. This tends not to happen as much with modern cars (1980's +) as the way leather was made changed, becoming more resilient against the prep. Not to worry though, it doesn't affect the end result!
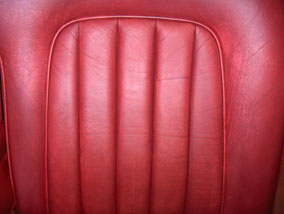
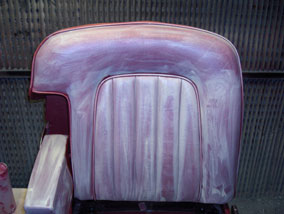
The photo to the left shows what the leather should look like after being prepped. You can see where the color has almost completely been removed in the middle flutes of the seat. Notice that the shine has also gone making the leather look more matt. This is the main indicator of correctly prepped leather (no shine), as the color will not always be removed.
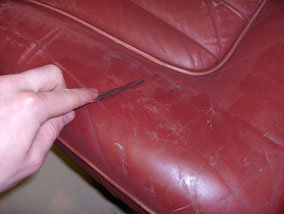
Leather is painted, that is how a wide variety of colors are achieved. When leather becomes old, it looks as though it cracks, but most of the time it is actually the paint that is cracked, not the leather itself. When you prep the leather, the painted layer is either removed or reduced greatly (as shown in the above picture) and so all the cracks are removed as well. This makes for a very smooth finish and excellent end result.
STEP 2. CLEAN THOROUGHLY WITH ALCOHOL CLEANER
Using a cloth, wipe the leather down with the alcohol cleaner. This process removes any waxes, oils or silicones that may be on the leather. Removing these gives better adhesion of color.
As you can see so far, like any job, preparation is the key to success. Take your time when doing it and your end results will be great. It's not a hard job to do - it can just be quite time-consuming!
STEP 3. FILL ANY REMAINING CRACKS WITH FLEXIFIL
After prepping the leather, there may still be a few small cracks in the leather. These are fixed by spreading the Flexifil over the leather with a palette knife. The filler only sits in the cracked leather. After applying a layer, leave for 5-10 minutes to dry. Build the Flexifil up in thin layers until all cracks are filled to be level with the surface of the leather.
The leather should then sanded smooth using fine 1200 grit sand paper.
STEP 4. SPONGE ON THE FIRST LAYER OF COLORANT
Once the leather has been properly cleaned and all repairs have been made, it is then time to apply the colorant.
The first coat is applied by sponge. This is done to work the color into hard to reach areas and to also minimise later spray applications. As you can see by the photo, the colorant used is highly concentrated and so, changes the color of the leather quickly.
This photo shows roughly what the leather should look like after one base coat of color has been applied.
When applying the base coat do not rub too hard for too long. Instead, applying gentle pressure, wipe the colorant onto the leather with a sponge.
To speed up drying use a hair drier and it should take no more than 5 minutes to be thoroughly dry.
STEP 5. SPRAY ON THE COLORANT & FINISH
The next step is to spray the Leather Colorant onto the leather using the airbrush in the kit. To start with, spray the color around the edges of the piping and in between the seat flutes.
This is covering the harder to reach areas first, which in the end, makes the job easier, and uses less colorant. Then proceed to spray the colorant on in thin coats over the seats until it looks nice and uniform. Always let the previous layer of colorant dry before spraying more on top.
After applying the colorant you should then seal it in with the finish. First spray on the Super-Seal, spray this on in 3-4 coats, then the Leather Finish should be applied. Spray on the leather finish in approximately 7-8 thin coats for best results. Always remember to leave time for each layer to dry before applying the next.
FINISHED RESULT
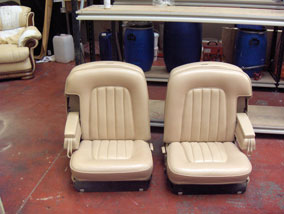
This photo shows the two front seats from the car, after a total color change. We changed them to a specially selected cream by our customer and applied satin finish.
 Leather Flexifil
Extremely flexible filler used to fix heavy cracking.
From $11.95An extremely flexible filler compound to help tackle and fix heavy cracking on your leather
View Product